


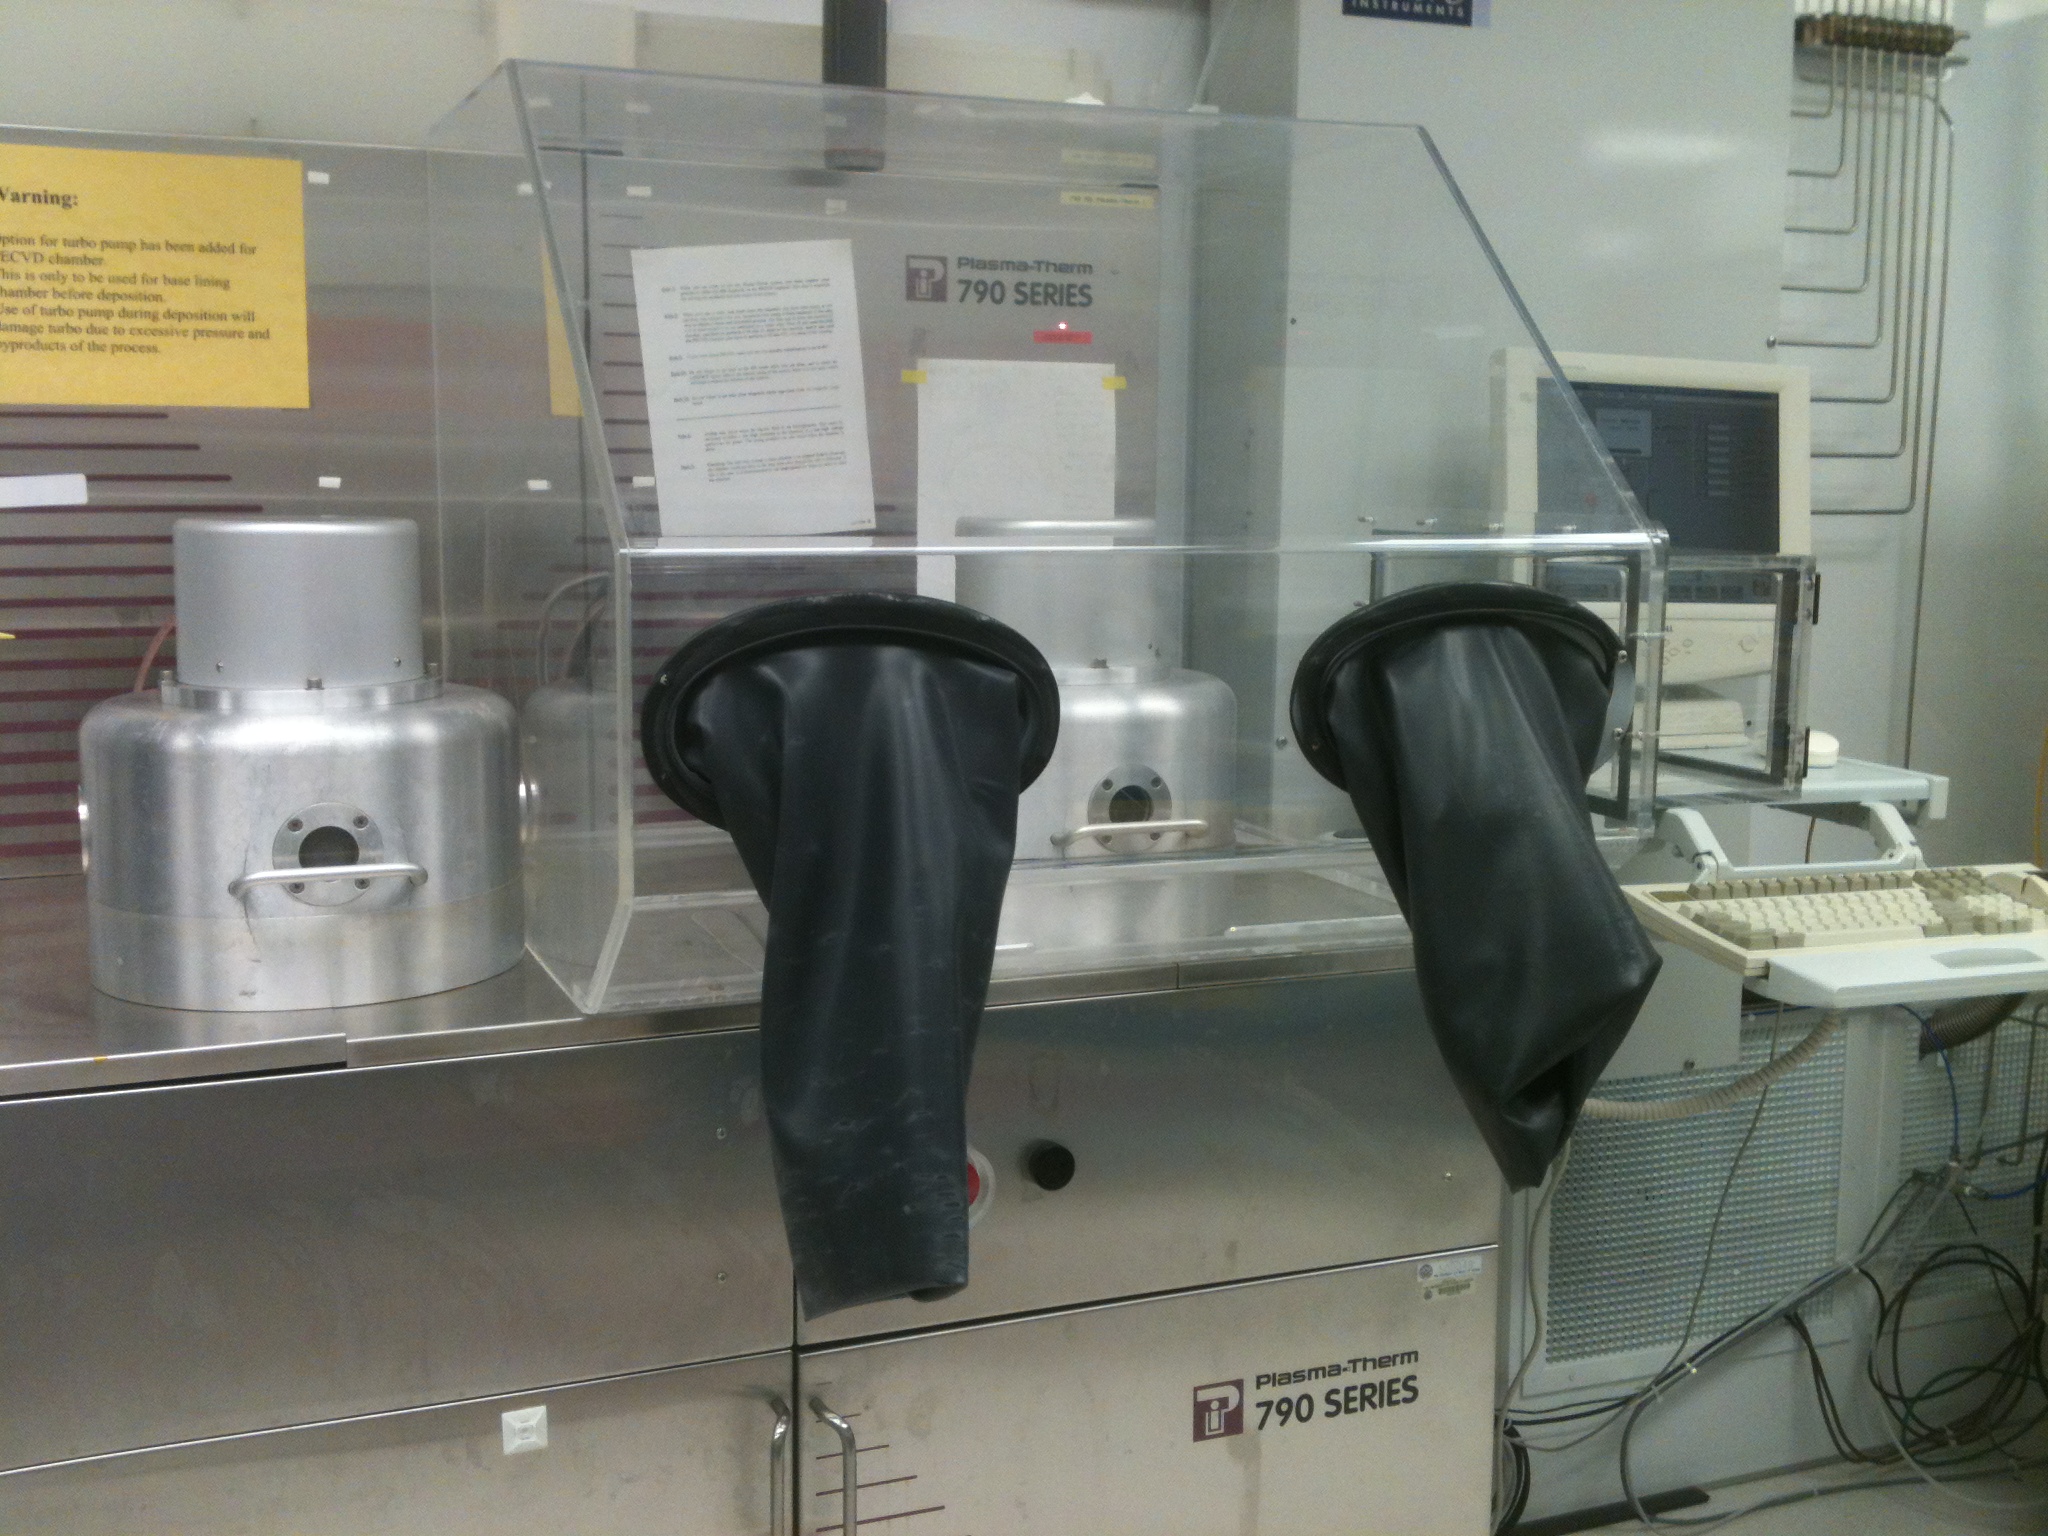
PECVD (Plasma Enhanced Chemical Vapor Deposition): Left chamber
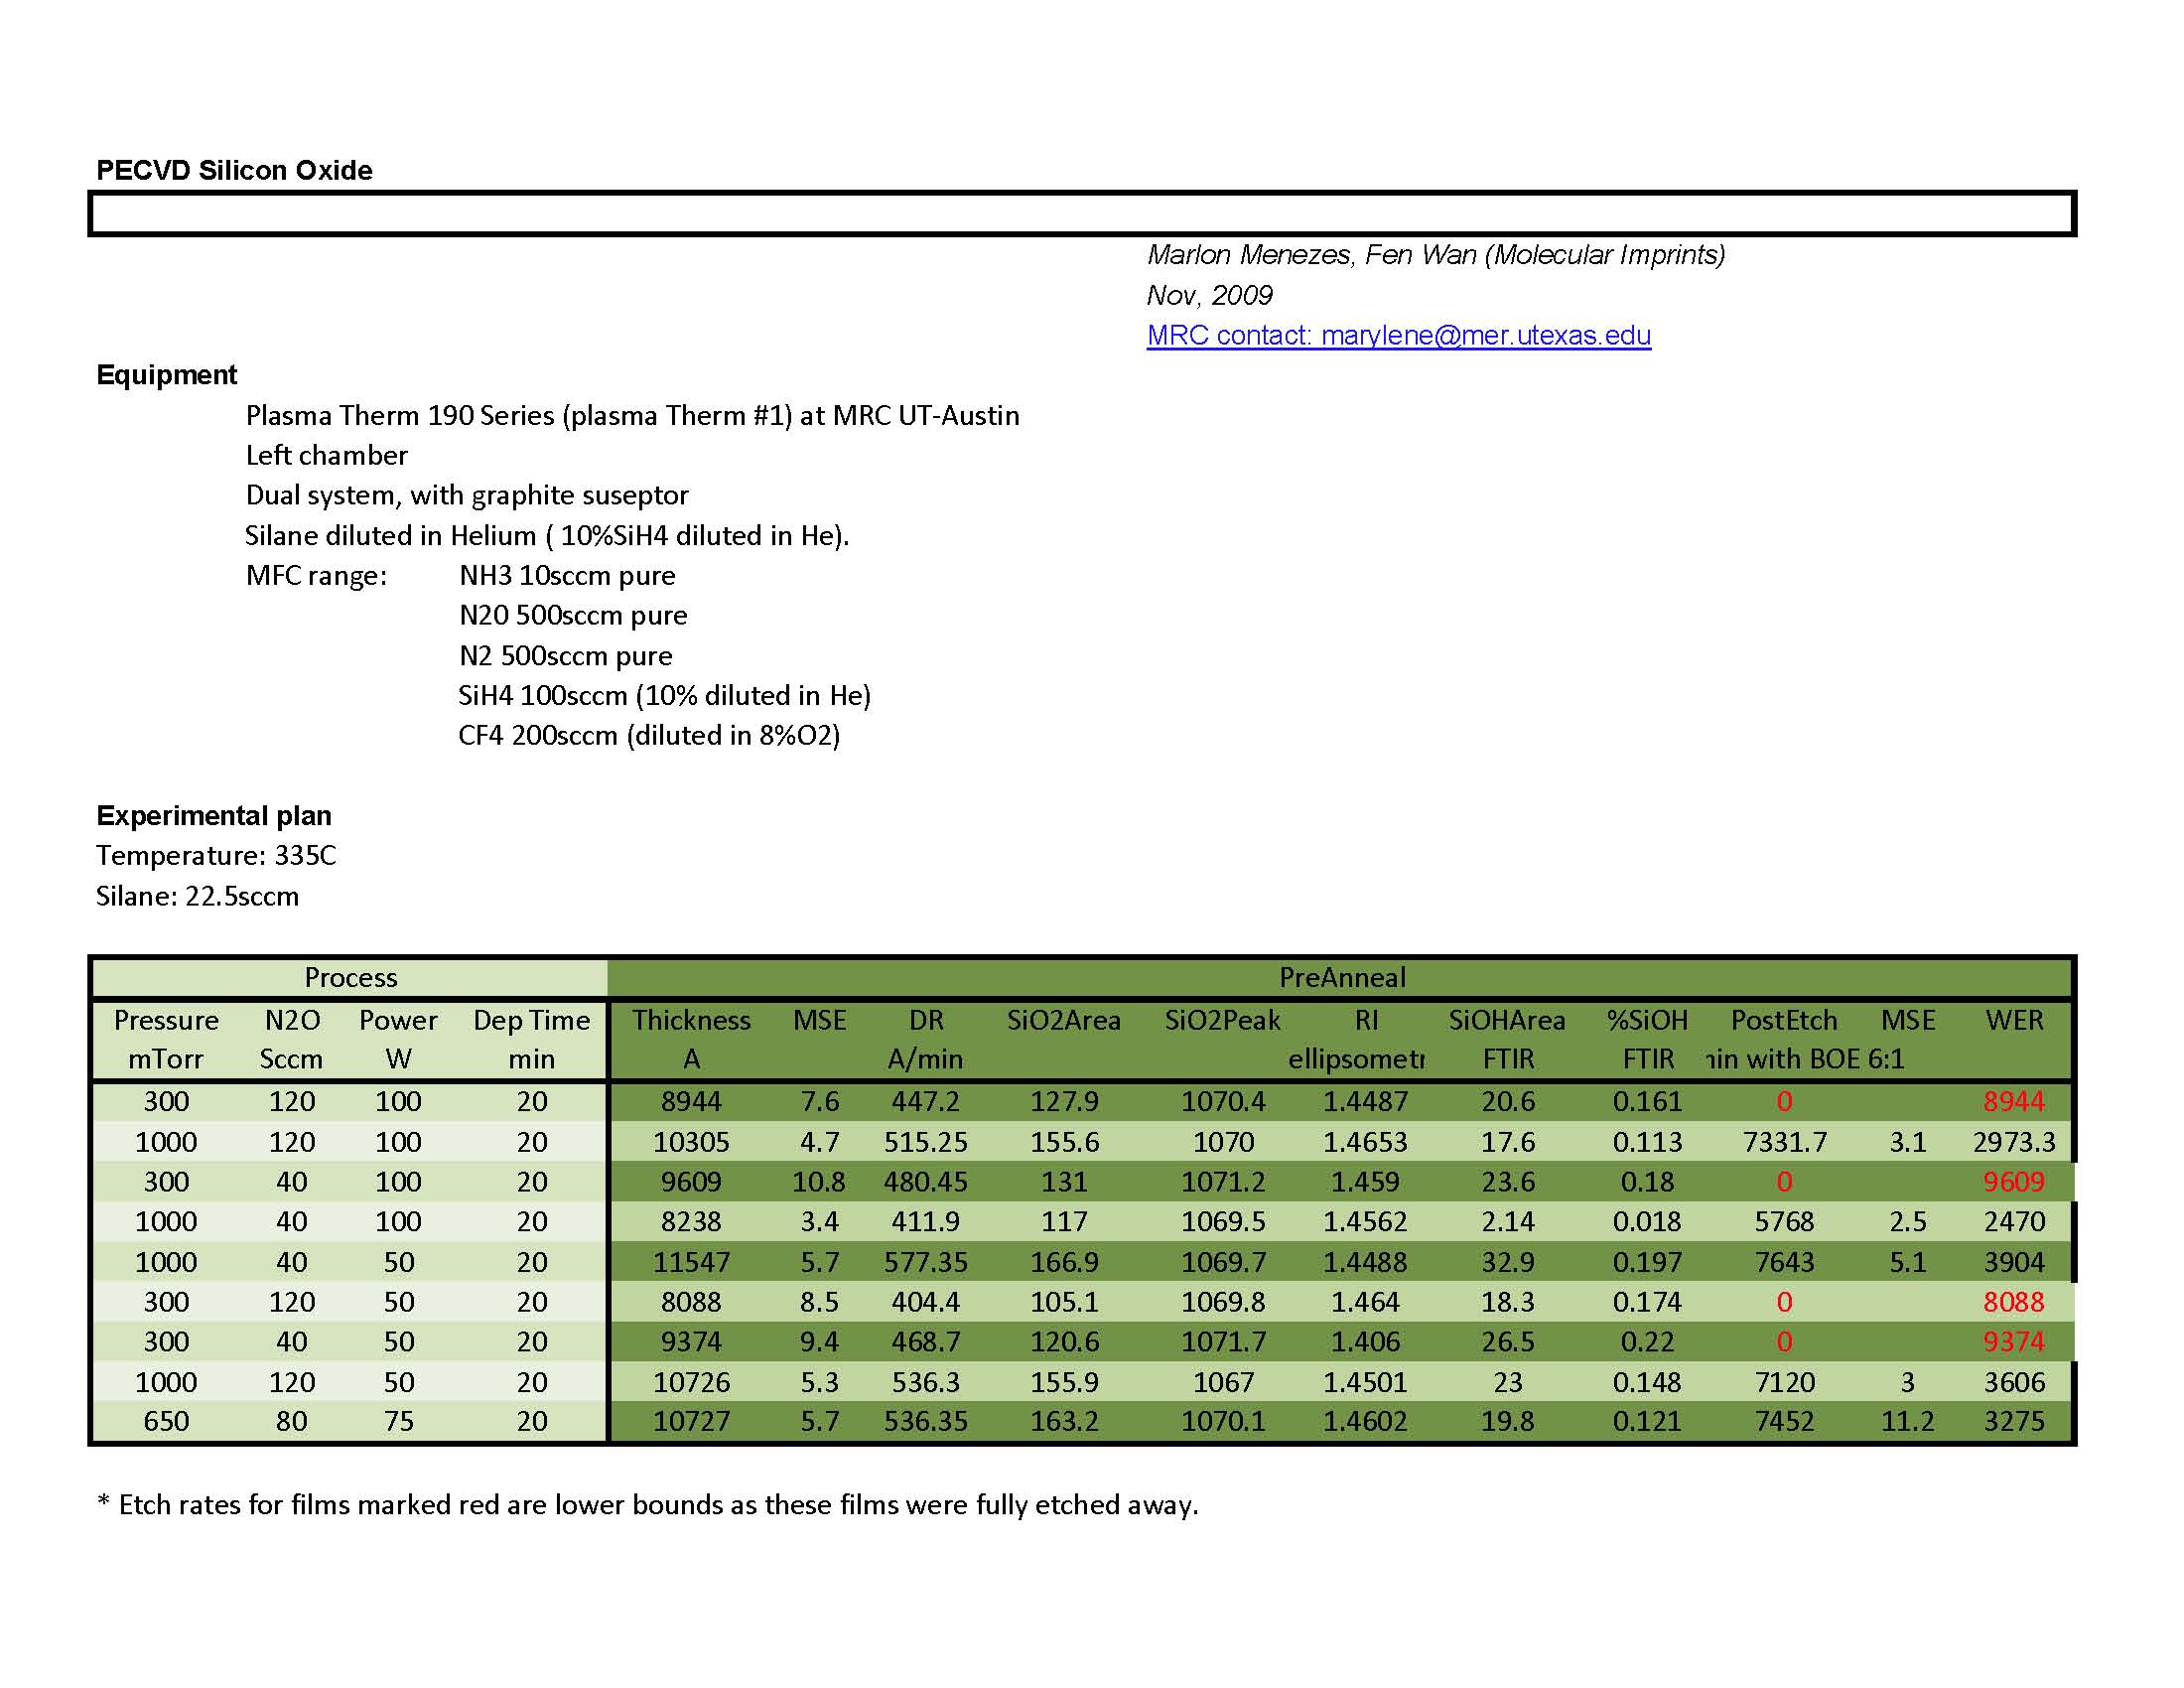
Design of experiment for PECVD SiO2 deposition in the green table on the left side (click to enlarge)
Temperature=335C ; SiH4=22.5sccm, Dep time=4min
variables: Pressure [300-1000 mTorr] ; N2O [40-120 sccm] ; Power [500-100W]
Measurements: Dep Time (min); Thickness (A)- MSE ; DR(A/min) ; SiO2 Area ; SiO2 Peak ; RI SiOH Area ; %SiOH ; Post Etch (A/min) ; MSE WER
Polysilicon deposition is prone to generate powder and brown film.
Make sure that the reactor is thoroughly clean before doing the deposition.
Polysilicon 1: 50 SiH4 100mToor and 50W at 150C for a rate 4nm/min.
Polysilicon 2: SiH4=100sccm, 550 mTorr, RF=50W
Polysilicon 3: SiH4 50sccm, Ar=100sccm, 7000mTorr, RF=200W
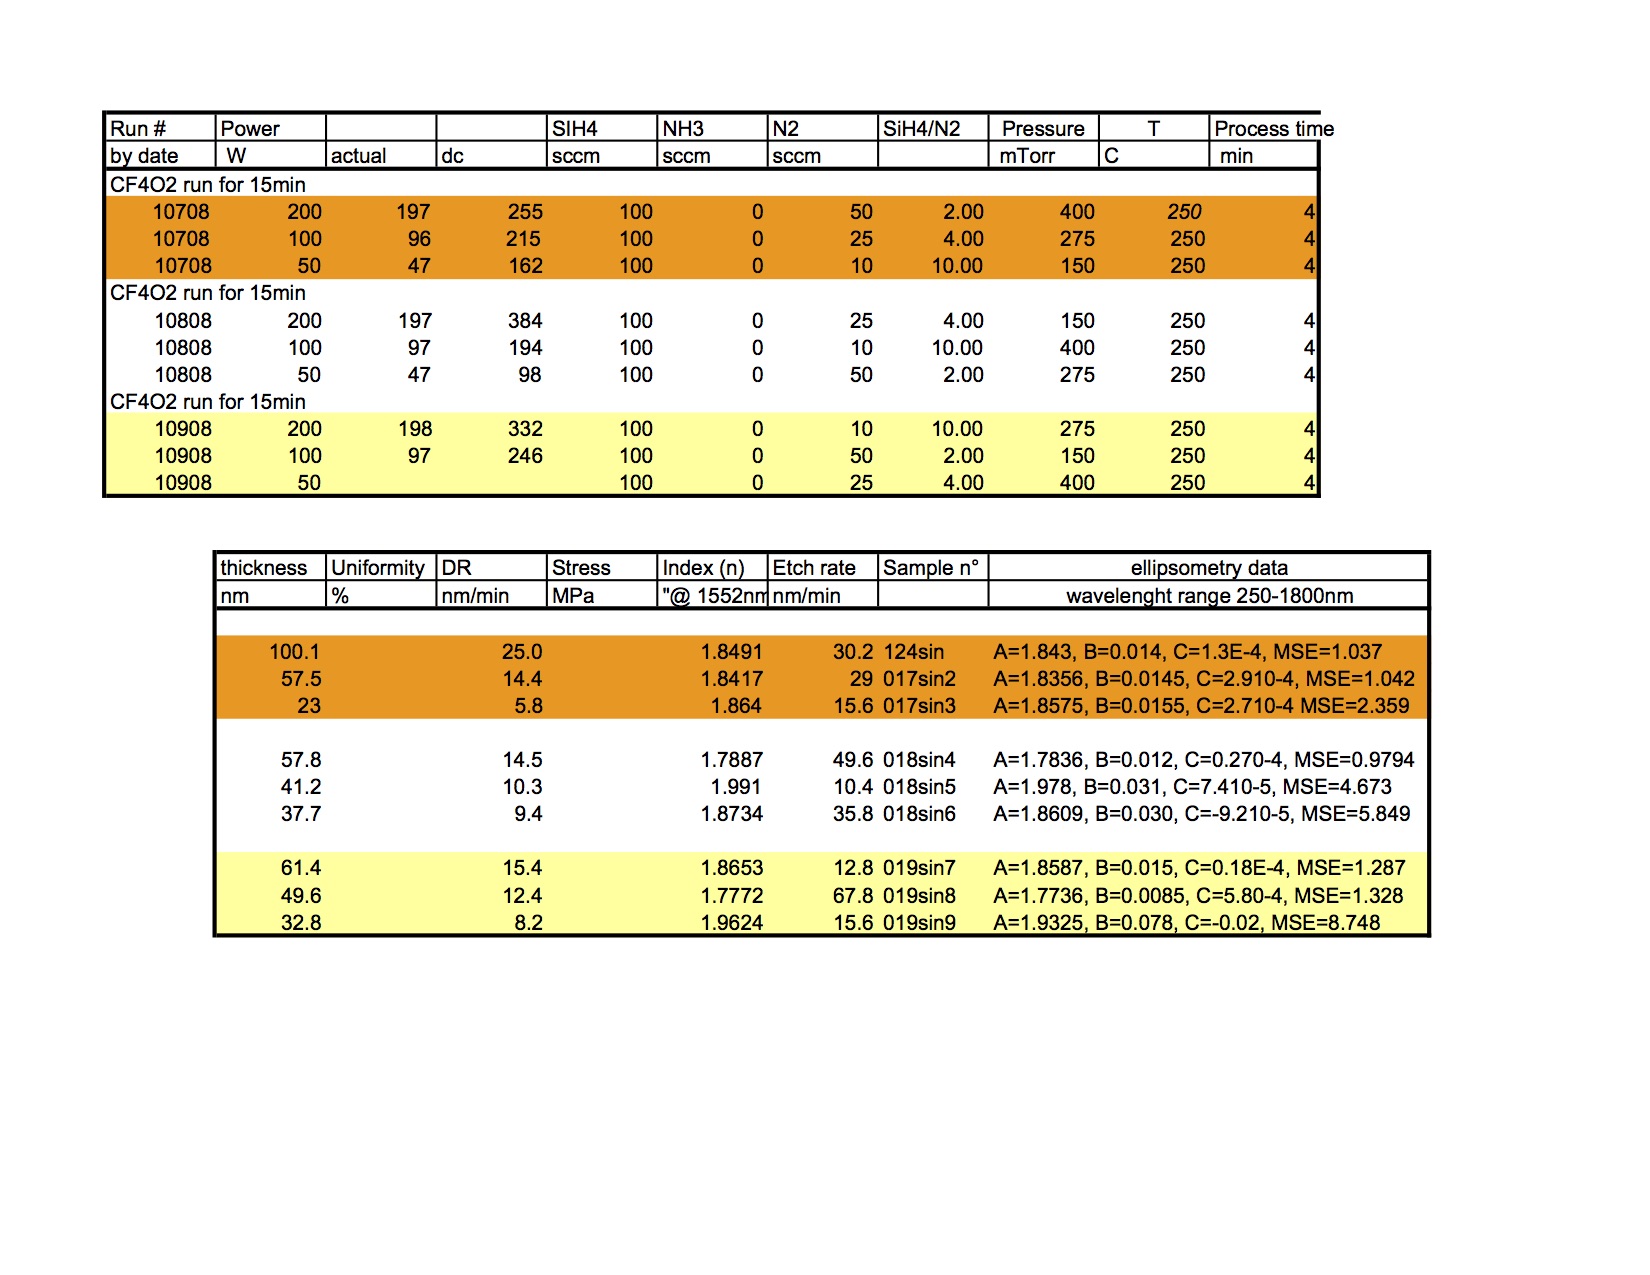
Silicon Nitride: See Design of Experiment in the orange table on the left side
Temperature=250C ; SiH4=100sccm
variables: Pressure [150-400 mTorr] ; N2 [10-50 sccm] ; Power [50-200W]
Measurements: Thickness (nm) ; DR(nm/min) ; Reflective Index (n@1552nm) ; Etch BOE6:1 (nm/min) ;
250C, 100SiH4 (10% diluted in He), 50sccm N2, 200W and 400mTorr --> DR=31.5nm/min index n= 2.39 (Oct 2017)
1. Log on to the tool using the LabAccess terminal.
2. Log into the system software.
3. Select the chamber to be used.
"“Utilities”=> “Select Active Chamber”=> chose the left chamber for PECVD deposition
4. Vent chamber : “Utilities”=> “Vent”
5. Clean the chamber before the first process is started. Wipe the walls and any quartz wafer holders with IPA. Wipe the graphite susceptor with IPA.
6. Run a 10 to 30 minute CF4/O2 clean, Pressure = 200mTorr, CF4/O2=1 (throttle valve, no flow regulation possible), power = 300W.
7.Vent chamber : “Utilities”=> “Vent”
8.Place your wafer in the chamber.
9.Firmly hold the lid to the chamber down and evacuate the chamber by choosing: “Utilities”=> “Pump Chamber”=> “Low Vacuum”. Once the chamber is under vacuum you may stop holding the lid down. System status will now be ON & STANDBY.
10.To edit a recipe choose: “Process”=>”Edit”, now choose the recipe from the list. Edit the recipe and save it before exiting.
11. To load a recipe choose: “Process”=>”Load”, now choose the recipe. System Status will change to ON & READY. The loaded recipe will show in the Process box at the lower right.
12. Run the loaded recipe by clicking the RUN button at the lower right.
13. Once your recipe is finished, vent the chamber, remove your sample with tweezers (HOT wafer) and pump the chamber down again.
14. ALWAYS CLOSE GATES. Always close the gate between the chamber and the pumps before logging off or when leaving the system idle for over 10 minutes. When the gate is left open pump oil back streams into the chamber. Choose: “Utilities”=>”Close Gates”.
15. Log off of the tool using the LabAccess terminal.