


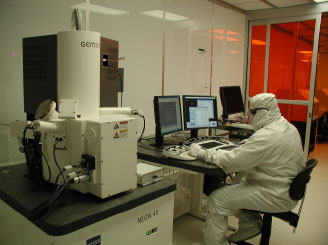
Scanning Electron Microscope
ZEISS Neon 40 SEM
Features: - magnification range for 23x to 2,634,240x,
- High tension range from few kV to 30kV
- Secondary Electron detector: SE2, In-lens Secondary Electron detector: In-lens and Back scattering detector.
- Substrate holder: 4inch wafer and pieces
- travel 50mm in X and Y direction.
- Raith Elphy Quantum pattern generator.
- EDS Bruker probe
A training video how to get images using the Zeiss SEM:
https://youtu.be/P92wk0rM3Jo
Log on tool using Lab Access
Log on to SmartSEM (Zeiss desktop Icon) by entering you User name and Password.
Have sample(s) ready to load on the specimen holder.
Specimen Change.MLF. Selecting this macro will vent the chamber and allow the user to load and unload samples. Select the drop down menu (arrow down) on the same icon to access the Resume Exchange.MLF. This will pumpdown chamber after loading a sample or completing SEM work.
.
Voltage and Aperture. This icon contains standard macros for 30 micron aperture and pre-defined EHT values. These are already calibrated. 1KV_30U_STD, 2KV_30U_STD, 3KV_30U_STD, 5KV_30U_STD
Pix Avg 1 . Noise Reduction = Pixel Avg. This macro allows the user to select Noise reduction mode. LINE AVG, FRAME AVG, LINE INT, FRAME INT, CONT AVG
Toggle INLENS:SE2. This macro allows the user to easily select between INLENS:SE2. Select the drop down menu (arrow down) on the same icon to access the Back Scatter Detection (BSD) mode.
Scan speed. This macro allows to quickly select the scan speed from 1-15
Normal scan. Allows switching to normal scan
MAG/Brightness. This Icon has a scroll down menu that allows the user to make adjusments for either Magnification & Focus or Brightness & Contrast using the mouse.
CTR Feature. This macro allows to easily center the image on the screen. When selected it will display a green cross. Move the cross to desired area and image will center on the screen.
Image capture. This macro allows the user to select from Quick image or Long image capture.
At the User Tool Bar (or by pressing Exchange on the keyboard) select icon. This is the “Specimen Change.MLF” macro. A message ‘Do you want to exchange the specimen?’ will appear. Select, Yes. This will lower the stage and vent the chamber. Another message will appear ‘Open door and remove specimen when vented.’ Select ‘Okay’. Note that the chamber will not be vented yet.
Figure 1: Zeiss Joysticks (Z and Tilts + Rotation X and Y) Zeiss Keyboard (Magnification, Focus, Astigmatism, Aperture X, Aperture Y, Resume, Exchange, Wobble…)
Chamber will vent in ~3min. Gently open the chamber and load sample. Insert specimen holder with the flat end (bottom of specimen holder) first. This will interface with the square part of the stage for a secure fit.
Gently slide the door closed. Press Resume on the Zeiss keyboard or select in the User TooBar. This is the “Resume exchange.MLF” macro. A message will appear ‘ Have you loaded a new sample?’.
Select ‘Yes’. This will begin to pump down the chamber and turn on the EHT with a setting of 5kV, aperture 30μm. The chamber is pumped down when the Vac button goes from displaying a red X to a green check mark a. This step takes ~2min. Once the vacuum reaches the 10-5 Torr range. A message will appear ‘Sample loaded complete.’ Select OK.
If you answer ‘No’, the chamber will pump down only and not turn on the EHT.
The Target EHT value is set up or modified
either by activating the EHT= of the Data Zone or
by entering a value in the SEM Control panel, under Gun for the EHT or
by selecting one of the 4 pre-set conditions in icon of the User Tool bar.
Select TV on the Data Zone screen. It is critical to monitor the stage and/or samples to ensure they do not contact the ‘nose cone’. Now you can raise the stage up or down using the Z Stage joystick. The T Stage joystick allows a stage tilt range of –10° to +60°.
Select Secondary Electron Detector (SE2) or In Lens at the
User Tool Bar by clicking on
at the Date Zone by clicking on the Signal A and selecting SE2 or,
at the SEM Control under Detectors or
at the Detection drop down menu on the windows toolbar
Use the X-Y Zeiss Joystick to select and identify feature(s) of interest for image capture and begin fine focus adjustment.
Stigmation control. Use the Stigmator X and Y control to tune the image. The Stigmator control knobs are on the ZEISS keyboard. It is recommended that you go back and forth beyond the stigmatism point so that you can clearly see when the image goes out of focus. This will help the user determine when the best tuning is achieved.
Wobble adjustment. The image can be further enhanced by adjusting the wobble. Select the Aperture window on the SEM control panel. Select Focus wobble The image movement can be reduced by
using the Aperture X and Y knobs on the Zeiss keyboard or
using the scroll (arrow keys) on the Aperture window at the SEM control panel.
It is recommended that you center back and forth beyond the stable point so that you can clearly see when the image goes worst. This will help the user determine when the centering of the aperture is achieved. Once the aperture is centered deselect the by clicking the wobble key on the Zeiss keyboard or Focus wobble on the SEM control panel..
Image capture. Once desired focus is achieved the image can be captured.
Select the Scanning option at the SEM control panel
Select Freeze on the Zeiss keyboard or on the SEM control panel.
Save Image. To save the image press the right click button on the mouse and select option ‘Send to’ and select TIFF file. Save image under your directory.
Complete image capture. After Image captured ‘Unfreeze’ the image by
selecting the Unfreeze button on the SEM control panel or
the Freeze button on the Zeiss keyboard
Unload specimen. Transiton from INLENS to TV.
Select Signal A=TV at the Data Zone window or
Detection at the ZEISS drop down menu at the top of the screen.
Select the Exchange on the Zeiss keyboard or
By selecting on the User tool bar.This will turn off the EHT, lower the stage and vent the chamber. This will take ~3min. Unload your sample.
Pump down the chamber. Press Resume on the Zeiss keyboard or select in the User TooBar. A message will appear ‘ Have you loaded a new sample?’
a. Select ‘No’, the chamber will pump down only and not automatically turn on the EHT.
b. Make certain the chamber pumps down (once the system vacuum reaches the 10-5 Torr range)
c. Enter all pertinent information on the SEM logbook especially system and gun pressures.