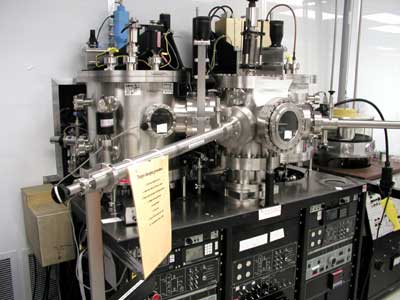
DC and RF sputtering system
Features: Chamber A: 4 inch target
Chamber B : 6inch Ta target
1. Log on to the tool using the LabAccess terminal.
2. Record the run in the KJL logbook.
3. Check the Chamber Status (Vacuum, interlock lights, and previous user’s comments)
4. Load Sample into the load lock
a) Switch load lock mode to STANDBY
b) Turn vent on
c) Wait until ATM reaches (~ 2 min)
d) Open door and turn vent off
e) Load a wafer and close door
f) Switch selection mode to Auto
g) Turn Auto-start
h) Wait until Load Lock reaches “High Vac” (~ 4 min)"
5. Transfer wafer from Load Lock to Sputtering Chamber
a) Open gate valve
b) Transfer wafer
c) Close gate valve
6. Preparing for deposition
a) Wait until the chamber pressure reaches less than 5E-7 Torr
b) Set the rubber belt for wafer rotation and wafer rotation ON
c) CLOSE Conductance Valve
d) Open the gas(es) you want to use: Gas 1 (Ar), Gas 2 (N2), O2
e) Select Chamber A or B
f) Open MFC(s): MFC1 is for Ar, MFC2 is for Gas 2 or O2
g) Wait until the chamber pressure reaches the setpoint value
7. Deposition
a) Check the condition of power source (MDX)
b) Turn the MDX ON
c) After your deposition time, turn the MDX off
d) Close MFC(s), chamber switch, and gas valve(s)
e) Turn off rotation
f) Open conductance valve
8. Transfer a wafer from the chamber to Load Lock
a) Open the gate valve
b) Transfer wafer from the chamber to the load lock
c) Close the gate valve
d) Switch load lock mode to the standby
e) Open vent valve
f) Wait until the load lock reaches atmosphere
g) Unload the deposited wafer and load a new wafer
9. Log off of the tool using the LabAccess terminal.


